How To Clean Vinyl Siding On A Budget (Homeowners Guide)
Vinyl siding is one of the most popular choices for homeowners, and it’s easy to see why. It’s durable, relatively low maintenance, and adds a polished, clean look to any home. However, even the most resilient vinyl siding requires occasional cleaning to maintain its beauty and longevity.
All sorts of elements can effect your siding, including:
- Dust
- Pollen
- Mold
- Mildew
Left untreated, these elements can dull the look of your siding or cause damage.
The good news? Cleaning vinyl siding is straightforward and doesn’t require expensive equipment or professional services. With the right tools, techniques, and a little bit of time, your siding can look as good as new. Here’s an in-depth guide on how to clean vinyl siding.
Why Cleaning Vinyl Siding Is Important

Before we jump into the step-by-step process, it’s important to understand why cleaning your siding matters. While vinyl is highly resistant to rot and pests, dirt and grime can still build up over time. Here’s why regular cleaning is essential:
- Longevity: Dirt and mildew can slowly degrade vinyl siding, reducing its lifespan.
- Curb Appeal: A spotless exterior enhances the overall appearance of your home.
- Prevention of Stains: Certain types of debris, like tree sap or algae, can cause permanent stains if left untreated.
- Property Value: If you’re considering selling your home, a well-maintained exterior increases the likelihood of attracting buyers.
How To Clean Vinyl Siding For Your Home
Now that we understand the importance of a clean exterior, let’s break down the steps to get your vinyl siding looking good as new.
Step 1: Gather Your Supplies
Cleaning vinyl siding doesn’t require fancy tools, but having the right supplies will make the process faster and more effective. Here’s your checklist:
Tools:
- A soft-bristle brush or broom with an extendable handle
- A garden hose with a spray nozzle
- A ladder (if necessary, for hard-to-reach spots)
- Protective gloves and safety goggles
Cleaning Solutions:
- Mild dish soap or laundry detergent
- A white vinegar solution (1 part vinegar to 3 parts water) for mildew
- Commercial vinyl siding cleaner (optional, for tougher stains)
Pro tip: Avoid using abrasive brushes or steel wool as they can scratch the vinyl surface. Always test your cleaning solution on a small, inconspicuous area to ensure it doesn’t cause discoloration.
Step 2: Inspect Your Siding
Before you begin cleaning, inspect your siding thoroughly. Look for cracks, loose panels, or areas where water might have seeped inside. Addressing these issues before cleaning will prevent further damage. If you find mold or mildew, prioritize these areas as they require more care.
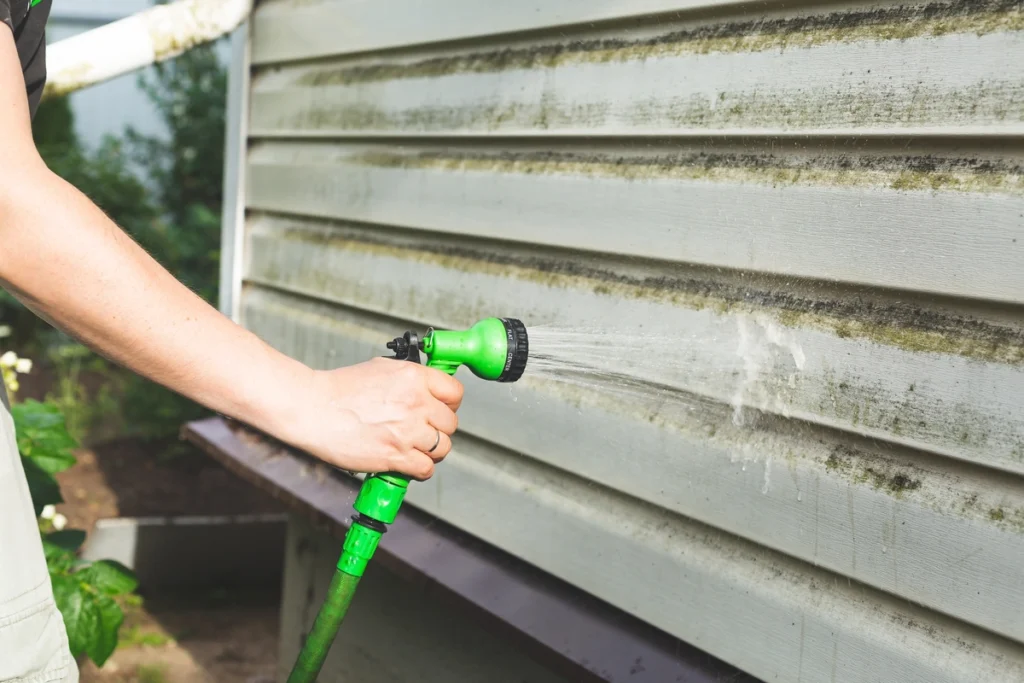
Step 3: Rinse the Siding
Start by rinsing your siding with a garden hose. Spray from the top down to avoid pushing dirt under the siding panels. The initial rinse will remove loose debris like dirt, spiderwebs, or pollen, making it easier to clean later.
Important Note:
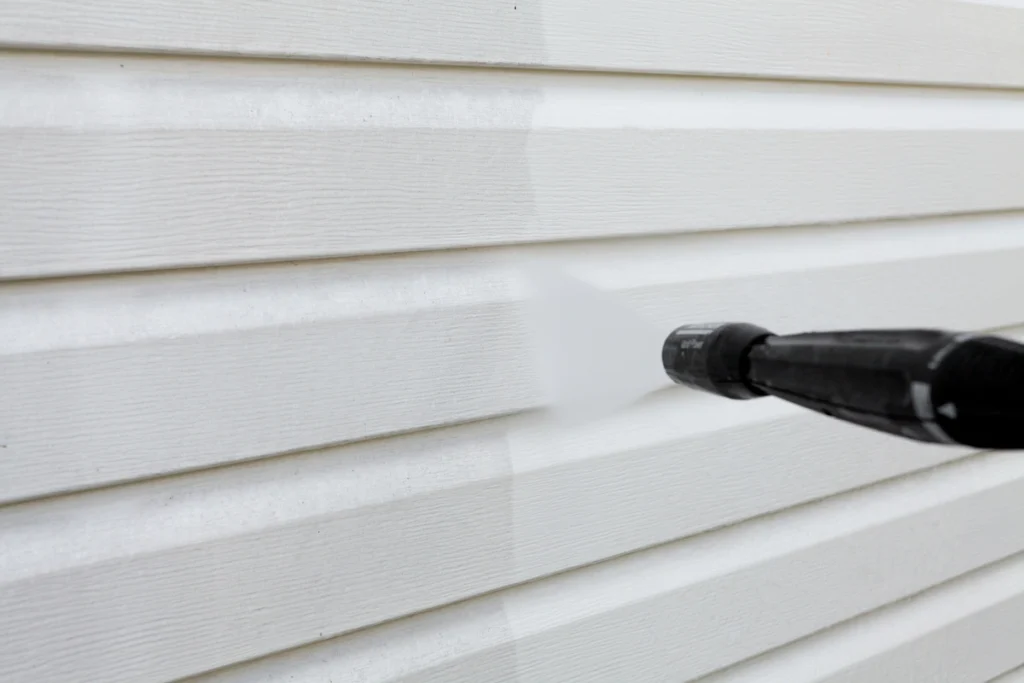
Avoid pressure washing unless you’re experienced with it. If used incorrectly, pressure washers can damage vinyl siding or force water behind the panels, causing moisture buildup and mold growth.
Step 4: Apply Cleaning Solution
DIY Cleaning Solutions:
Most grime can be removed with mild dish soap or a simple water-vinegar solution:
- Soap Solution: Mix 1 gallon of water with 1/3 cup of dish soap or laundry detergent.
- Vinegar Solution: Mix 1/4 cup white vinegar with 3/4 gallon of water. Vinegar is particularly effective at tackling mold and mildew.
Commercial Cleaners:
If you’re dealing with stubborn stains or heavy grime, a vinyl siding cleaner like Simple Green or Zep House & Siding Cleaner can be helpful. Follow the manufacturer’s instructions before applying.
How to Apply:
- Fill a bucket with your chosen cleaning solution.
- Dip your soft-bristle brush into the mixture and start scrubbing the siding.
- Work in small sections, starting from the bottom and moving up to prevent streaking.
Pro Tip: Avoid using bleach unless absolutely necessary. While bleach can effectively remove mold, it may discolor your siding over time. If you do use bleach, dilute it heavily—1 part bleach to 10 parts water.
Step 5: Scrub Gently, But Thoroughly
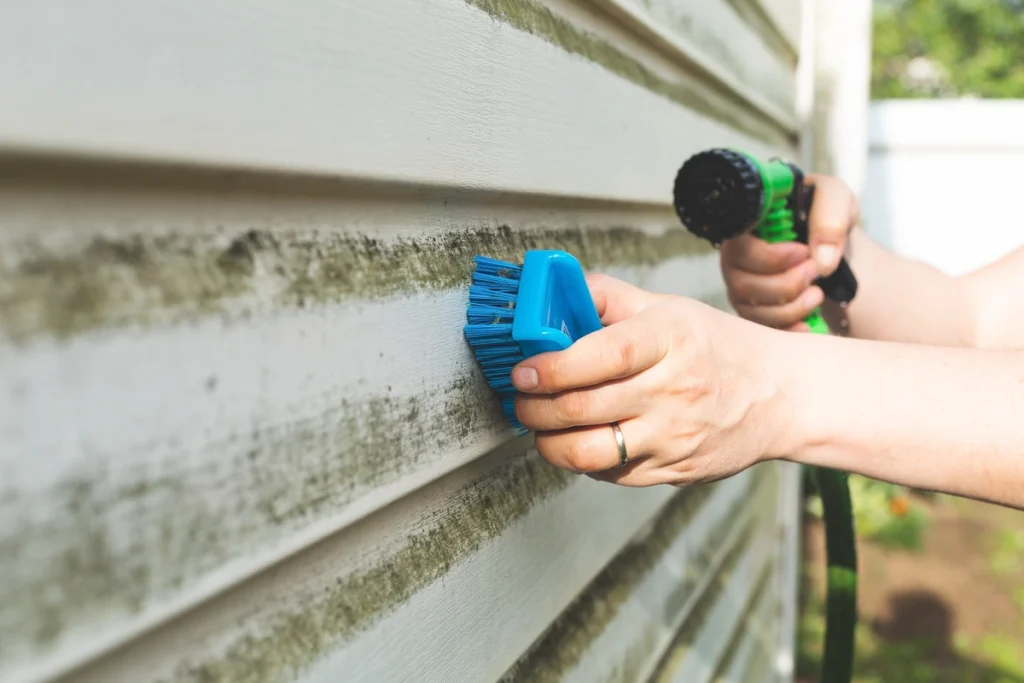
For tougher stains, lightly scrub with your soft-bristle brush. Focus on areas with visible mold, mildew, or algae growth. Pay close attention to shaded sides of your home, as these areas are more prone to mildew.
Avoid Scrubbing These Areas Too Hard:
- Around corners or seams where the siding connects
- Below window frames
- Near decorative trim
Over-scrubbing in these areas can loosen panels or damage the seals.
Step 6: Rinse Again
Once you’ve scrubbed a section, rinse it thoroughly with your garden hose. Start from the top and work your way down to ensure all cleaning solution is washed away. If you’re using a commercial cleaner, follow the instructions to confirm how long it should sit before rinsing.
Step 7: Dry and Inspect
After cleaning, step back and assess your work. If any grime or stains remain, tackle those specific areas again using the same steps above. Once you’re satisfied, allow the siding to air dry naturally. Avoid drying with towels, as this can leave lint behind.
Post-Clean Care:
Once your siding is dry, check for parts still dirty, missed spots closer to edges, or any small cracks appearing during the clearer post wash.
Dealing with Common Siding Issues
While cleaning, you may encounter specific problems such as:
Mold or Mildew:
If mildew persists after cleaning, use a stronger vinegar solution or a vinyl-safe mold cleaner. Remember to rinse thoroughly after application.
Algae:
On north-facing walls or damp areas, algae can grow on siding. Use an oxygen-based cleaner to remove it effectively.
Rust Stains:
Rust stains from nearby pipes or fixtures can be tricky. Try a mixture of vinegar and baking soda, then scrub gently.
Pro Tip:
Prevent future growth of mold or algae by trimming back shrubs and trees near your siding. Enhanced airflow and sunlight will help keep your siding dry.
Maintenance Tips for Long-Lasting Vinyl Siding
Now that your siding is clean, follow these maintenance tips to keep it looking fresh:
- Clean Annually: Set a reminder to clean your siding once a year, preferably during spring or summer when weather conditions are optimal.
- Inspect Regularly: Check your siding for cracks, loose panels, or weathering every few months and address issues immediately.
- Trim Landscaping: Keep bushes, trees, and plants trimmed to avoid dirt and debris collecting near your siding.
- Avoid Harsh Tools: Never use high-pressure washers or abrasive materials—they can damage your siding.
- Monitor Gutters: Clogged gutters can cause rainwater to splash onto your siding, leading to mold or mildew.
Sustainable Tips for Cleaning Vinyl Siding
If you’re eco-conscious, here are a few sustainable options to consider:
- Use biodegradable, non-toxic cleaners that are safe for plants and pets.
- Reuse water wherever possible (e.g., use the rinse water to clean driveways or garden furniture).
- Dispose of any chemical cleaners responsibly, following local guidelines.
When to Call a Professional
While cleaning your siding yourself is manageable for most homeowners, there are situations where calling a professional is the best option:
- Severe Mold or Algae Growth: Professional-grade equipment may be required to remove heavy growth.
- Tall or Hard-to-Reach Areas: If your home has multiple stories, professionals can handle the job safely and efficiently.
- Persistent Stains: If you’ve tried everything but the stains won’t budge, professionals can use specialized techniques to restore your siding.
Enhance Curb Appeal with Sparkling Clean Siding
Regular cleaning of your vinyl siding is an essential part of homeownership. It not only boosts your home’s curb appeal but also improves longevity and prevents costly repairs.
With the step-by-step approach detailed above, you now have the knowledge and tools to tackle grime, mold, and dirt like a pro. Whether you choose a simple DIY solution or a store-bought cleaner, the results will speak for themselves. Your home will look refreshed, and your siding will thank you for it.
Contact Veterans Contracting today to get help maintaining your siding today!